
AFTER: Hours after the photos in this tutorial were taken!
I have decided that it is time to do a "How-To" post on my blog, and since I've been getting several appreciated compliments on my hair lately, and since my hair is a special subject to me, I thought I'd tell women out there with similar hair as me a little secret that I learned pretty recently.
First off, I have severly flat, straight hair. I read tips in magazines all the time about how to create volume and curls, but to my dismay (and confirmed suspicions), they never work on my hair. My hair almost always refuses to hold a curl, and often remains limp and lifeless despite how many style products I spritz, squirt, and rub into it.
I have, however, figured out a way to create some volume, keep a curl for an entire day and eventually end up with a wavy style that I envy on those girls who wake up and their hair JUST LOOKS LIKE THAT!
Below is my step by step picture tutorial on HOW TO CREATE WAVY CURLS IN FINE, FLAT, STRAIGHT HAIR like mine. I think you'll be happy with the result, and also surprised at how easy it actually is to achieve.
My first recommendation to girls with hair similar to mine (you know, fine, flat, straight, limp, thin) is to ignore whatever you've read in magazines or online that tell you that washing your hair everyday is a bad thing. That may be the case for most women, but I know from experience, its not a suggestion I can use. I washed, repeated, and rinsed my hair yesterday morning before work, and I got up this morning and took this picture for you (it was 9 a.m.) so that you can see just how oily my hair is the next morning. Forget the entire next day! I've tried not washing it before and I feel disgusting, greasy, staticy, and most relevant to this entry...FLAT and LIFELESS. Don't believe me?


Here's all you need, by the way, or at least some variation of these tools. The velcro rollers are the key, and I really think some type of clamp is necessary to hold them in. The little metal clips don't create lines, but I use the big Scunchi clips on the under sections of my hair, because they're easier, and I don't care if there are lines there!!

I brush my hair out with a wide-tooth comb, then I roll it up in the best thing ever...a Towel Turbie, or whatever version you have. I think mine is called a Turban Towel (I assume that's the generic version!) This thing is amazing. It stays securly on my head, which allows my hair to go from soaking wet to damp in the time it takes for me to put on my makeup. Which is exactly what I do next.

I know, I'm pretty silly.
After letting my hair dry in the turban for about 15 minutes, it's time for some product. I'll show you the products I'm using right now, but as I explained with the shampoo/conditioner, I get bored awfully easily. But I will say, I'm pretty happy with the result of these products.

First up, I use Tresemme' 24 Hour Body Root Boost to create some artificial volume. I follow that with Nick Chavez Mist'r Flockr, which is similar to a aerosole-spray gel. I feel guilty about the heat I use every day, so I've recently started spray Pantene Fine Heat Protection and Shine in my hair. Rusk Shining spray goes in at the end, and Tresemme Tres Two Extra Hold Hair Spray (my favorite by far...and I've tried Big Sexy Hair [great results, but very stiff] and Elnette Satin [I was so excited to try it, and so disappointed with the results...which were almost non-existant on my hair!]
I start with the Root Booster, then spray the Flockr all over my hair. And then, usually as an afterthought, I spray some Heat Protectant all over too. As a mini, mini product review, I hate the nozzle on the Pantene Heat Protectant. The spray is way too concentrated and direct. I'd rather it just give me a big wide spray so it covers more area of my hair. Anyway, I don't go overboard with product, but I'm not shy either. I want it to be all over, so after I spray, I comb my hair through with the wide-tooth comb again.


Now it's time to blow dry. I'm going to show you several pictures of me blow drying my hair, because I want you to understand that there is no strategy or skill to this blow dry. I have tried since high school to perform a proper blow out with a round brush and blow dryer, but I usually just end up tangling a clump of hair in the round brush. That was a great look back in my senior year of high school, though, so I'm glad I learned that skill when I did :P However, now that I'm in the real world, I get some funny looks if I go in with my round brush still dangling from the back of my head. Damn conformists!


Alright, here's the only time I use a round brush. I have some long bangs that I part to the left, and I want them to have a little curve in them. I start with a round brush to give the end pieces a bit of curl, and then I switch to a regular ole Conair straight brush to add a little lift to the bangs. You really can't mess this up. Even if you do, just pin them back like I did on Friday! (And you thought I planned to do that all along, didn't you?!)


I wish I could remember where I read this next tip, but I can't, so I'll just go ahead and credit myself with it too (I'm sure you'll take this glory from me as well, Glamour). After it's all nice and dry, I take my hair spray and spritz a fine layer all over my hair, and then brush it out (seems counter-productive, but I swear, it just spreads a little bit all over, and the Tresemme' doesn't leave it sticky at all). I make sure my parts are in the right places (to the side and down the back) after all that side to side flipping. I also spray my bangs where I want them right now, because if I don't, they'll be in my eyes before the end of this tutorial. And I can't teach if I can't see!


Now's the fun part. All we're going to do is curl our hair with a regular ole curling iron. Mine's a Conair, and I think its a 1.5 inch barrel, but really, I just guessed that because I don't know. And it doesn't really matter. Use your favorite curling iron, whatever brand and size, and follow me.
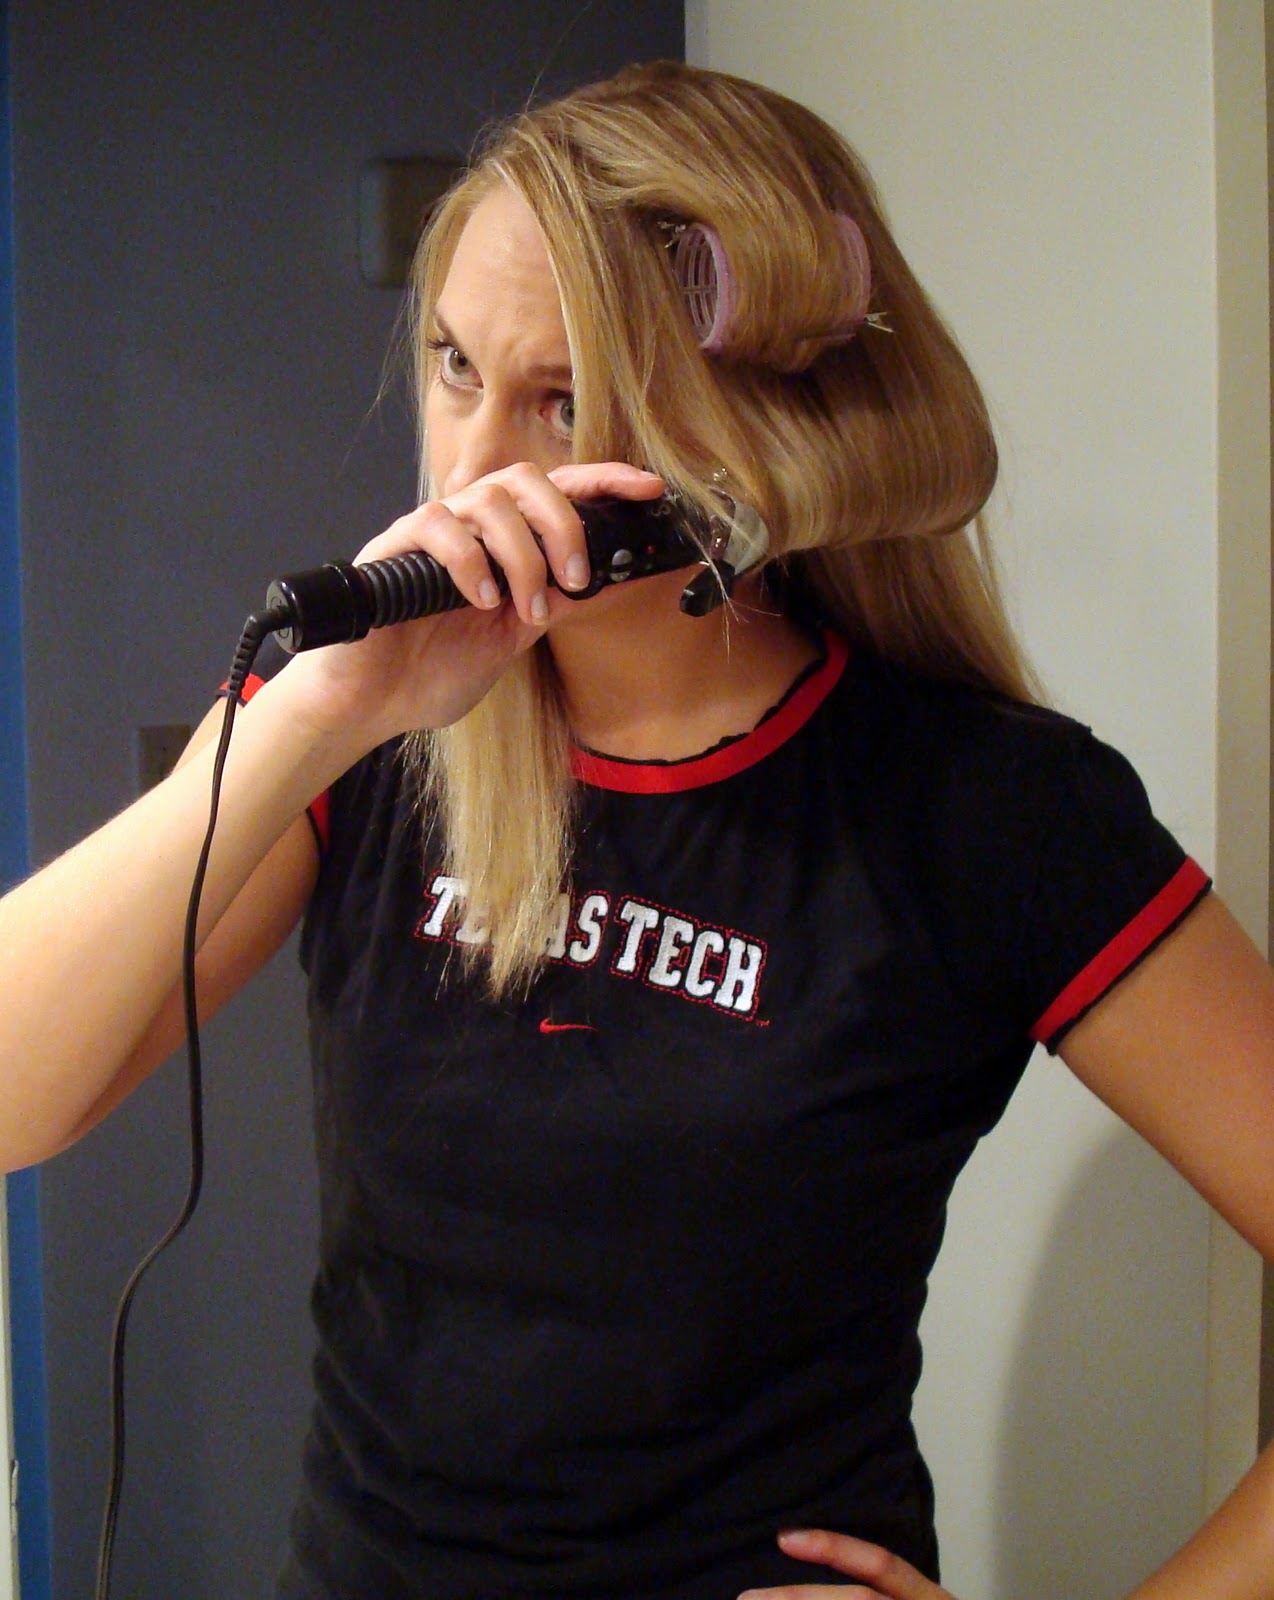
We are going to: (1) Hairspray a strand of hair, (2) Curl a strand of hair, (3) Curl a velcro roller around the hot strand of hair, and (4) Clip it. It's easy, watch!

HAIR SPRAY AND CURL.

BE CAREFUL, IT'S HOT!

CURL THE VELCRO ROLLER AROUND IT.

CLIP IT!
Get that? Need to see it again?


So, once you've gone all the way around your head (and again, there's not a lot of strategy, but you'll figure out the best way to space out those groups of strands...and really, the less organized the curls, the more "I just look like this naturally" it will look!)
This is what it'll look like! Give it a good mist of hair spray at this point.


Now go away. Go put on your office clothes for the day. Go make your husband a surprise breakfast of waffles and milkshakes. Go take the vitamin you forgot about. Essentially all you're doing is letting the curl cool. And it is essential - letting the curl cool while its still in its curl mold is THE KEY, THE MAIN POINT, the WHOLE BALL OF WAX...it's EVERYTHING. If I have time, I wait about 15 minutes. If I don't, I give my head a blast from the cool setting on my blow dryer for a few minutes. And you know, more than likely, I slept through two snoozes on my alarm, so its the Cool Blast for me.
Now we're at the easy part. Take it all down. Pull the velcro curler down your hair, exactly opposite the way you put it up. If you're lucky, the curler will snag a bit in your hair and you'll have to give it a little tug. I'm not being sarcastic there - this tugging process naturally combs through your curl a little, so by the time you're done pulling them all out, there is hardly anything left to do. And you don't look like you have big curling iron curls. You just look beautiful and like you have naturally big curls...you know, if we had beautiful and naturally curled hair.


After I pull them all out, all I do is lift the back portion of my hair (where i put that back part) and spritz some hair spray right at the root and hold the hair up...for about 5 or 10 seconds to give it time to dry. When you set it down, your hair will be lifted just a bit. This is a great trick all over your hair if the girls call you up for a happy hour after work and you're feeling a bit flat--take some hair spray to work, spritz it around your roots and hold the hair up to let it dry. Tiffany D taught me that trick in one of her videos. After that, I just finger comb the curls a little to combine them all...for this look I don't want separate curls...spritz some shine spray and voila!


You're all done! Spray it with a blast or four of hair spray, and off you go!! And the best part? As the day progresses, and you do start to lose just a bit of that curl...it will loosen up into Serena van der Woodsen-type waves!!


haha fun post :) your hair really is straight! love the little bounce at the end :)
ReplyDeletexoxo
I absolutely loved this tutorial - your writing is so funny! - and I don't even have long hair!
ReplyDeleteI enjoyed reading through some of your posts - keep it up!
Cheers,
Sheila